We suggest keeping the ‘Sample EE’ tab on your spreadsheet so you can quickly copy a tab for new hires.
Steps
- Right click on the ‘Sample EE’ tab and select ‘Move or Copy’.
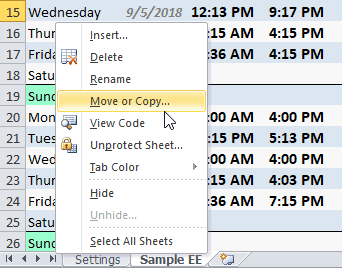
- On the pop-up select the following and press ‘OK’.
(move to end)
Check box to ‘Create a copy’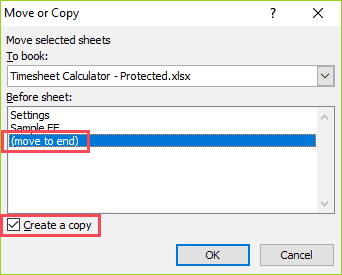
- On your spreadsheet you will now have a new tab named Sample Employee (2).
Right click on the tab and select ‘Rename’.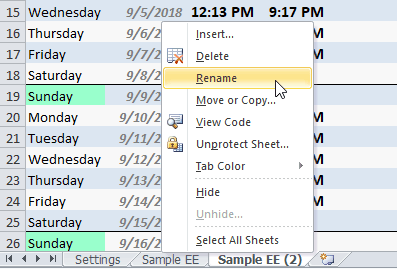
We suggest using a First Name + Last Initial to save space.
- On the new tab, update Employee Name, Hire Date, and Pay Rate.
Then delete any sample punch data and notes (highlighted below).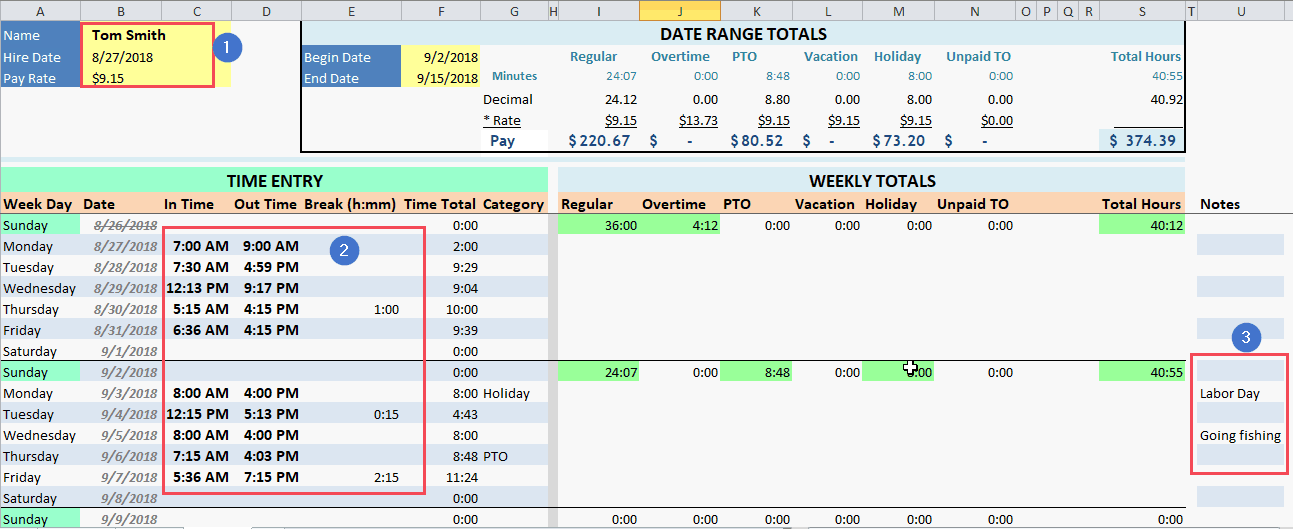
- That’s it!
You are now ready to start using the time card for your new employee.
Custom Pay Categories can be found on the ‘Settings’ tab. Simply type your custom pay categories in the yellow highlighted boxes.
You may delete current Pay Categories if you have not used them on a timesheet.
You will not be able to delete Regular or Overtime as they are used in Overtime calculations.
*Important Note* – Do not modify existing Pay Categories after you have started using this workbook.
Doing so will cause inaccurate calculations in the Weekly and Date Range Summary sections of the time card.
After downloading the Excel Timesheet, the file is now officially yours to save and access whenever you need.
As a best practice, we suggest you save this file to a shared folder that is backed up routinely.
This can be a shared drive on your company’s network or a cloud drive such as Google Drive or Box.com.
We suggest a cloud service, as this will allow you to access and edit the document at any time.
A cloud based drive also gives the added benefit of sharing the file to any administrators or supervisors who will be modifying the time cards.
Please see the below links if you would like more information on how to use a cloud based drive:
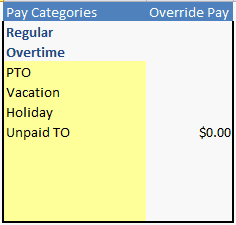
Overriding a Pay Rate on a company level can be done in the Pay Categories box on the ‘Settings’ tab.
In the Override Pay column, type in the dollar rate that should be paid.
This is most commonly used if you are tracking Unpaid Time Off and do not want employees to be paid. You can also do this if all employees are paid the same rate for a certain category, such as Holiday.
In the screenshot below, you can see that Unpaid TO is paid at $0.00.
When running the Date Range Report, you will see any hours on this column be paid at the override rate.
*Important Note* – Modifying existing Override Pay Rates after you have started using this workbook will change existing time entries to the new pay rate.

The Date Range Totals Report returns the summary of hours for an employee by pay category for the selected date range.
To run the report, fill in the Begin Date and End Date highlighted with a yellow box.
Begin Date must be the first day of a work week.
End Date must be the last day of a work week.
Pay line calculates earnings by category with a Gross Wage total.
Note – Selecting an invalid Begin or End date will return inaccurate results as the report will not correctly capture Overtime hours.

The Time Total column is a calculation of the time spent between In Time and Out Time Columns – MINUS the Break (h:mm) column.
Please note that Break (h:mm) is time that is spent on unpaid breaks such as lunch and should not be used to track paid breaks.
If you feel that you are your spreadsheet is still calculating time incorrectly, please email support@inbadge.com and include the Version # of your spreadsheet.
Version can be found on the ‘Settings’ tab just below the inbadge logo.
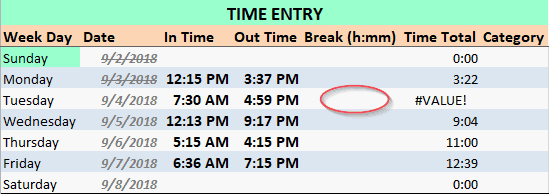
This common error message appears when a field is entered incorrectly on the In Time, Out Time, or Break (h:mm) column.
See below formatting rules and verify your times are entered correctly.
Correct: 7:00 AM
Incorrect: 7:00AM (Fix: add a space between ’00’ and ‘AM)
Incorrect: 700 AM (Fix: add a ‘:’ colon between ‘7’ and ’00’)
Also pay attention for any other characters (including spaces).
For example, in the image below there is a space in the Break (h:mm) column.
To fix, press [Delete] on this field.
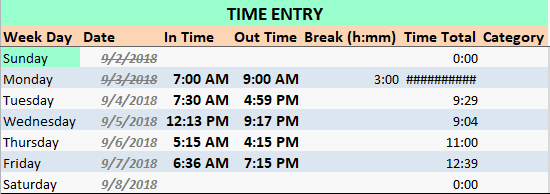
This error message means that the Total Time column is either negative or is too large of a number to display.
Generally this is caused by a Break entry issue or if the Out Time crosses midnight.
In the example below an employee worked 2:00 hours, yet has a 3:00 hour break.
To fix, please make sure to type in the break in hour:minute format.
(see Correct and Incorrect formatting below)
Break (h:mm) – stands for Break (Hour:Minute)
Time entered for breaks must be entered as hours:minutes format.
Correct: 0:30 (for 30 minute break)
Correct: 1:00 (for 1 hour break)
Correct: 1:15 (for 1 hours 15 minutes)
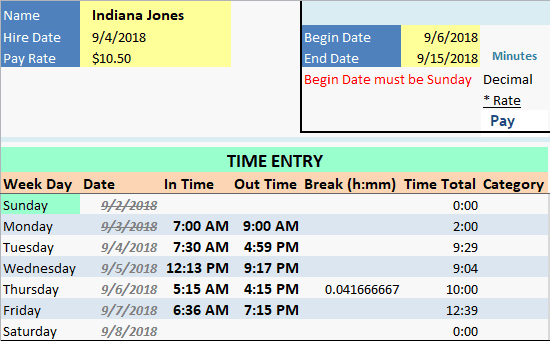
Incorrect: 0:60 (this will cause your break hour to show a weird decimal time e.g. 0.041666667)
Incorrect: 0.50 (time entries must be in hour minute format. Decimal entries will not calculate correctly)
Currently time cards do not have the ability to calculate times that cross midnight.
For example a time from 7:00 PM to 2:30 AM will not calculate.
If this is a need for your business, please consider sending an enhancement request to support@inbadge.com.
Break (h:mm) – stands for Break (Hour:Minute)
Time entered for breaks must be entered as hours:minutes format.
Correct: 0:30 (for 30 minute break)
Correct: 1:00 (for 1 hour break)
Correct: 1:15 (for 1 hours 15 minutes)
Incorrect: 0:60 (this will cause your break hour to show a weird decimal time e.g. 0.041666667)
Incorrect: 0.50 (time entries must be in hour minute format. Decimal entries will not calculate correctly)
To fix, delete the break and re-enter with correct formatting.
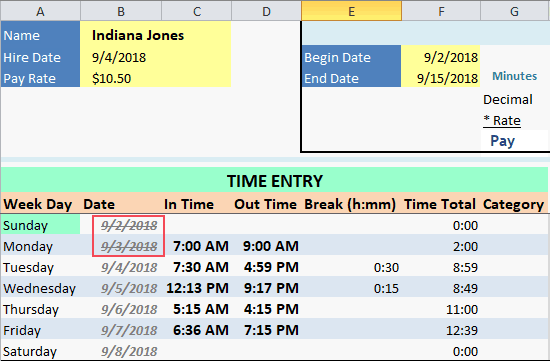
Date Line is crossed out – 9/2/2018
The time clock spreadsheet has logic built in to help prevent time entries prior to the employee’s hire date.
(highlighted in red box below)
In this example, an employee was hired on 9/4/2018.
The Weekly start date is a Sunday; so the time card populates 9/2 & 9/3 dates crossed out as both days occur before the employee’s hire date.
Note: You will still be able to add time entries on this date if needed.
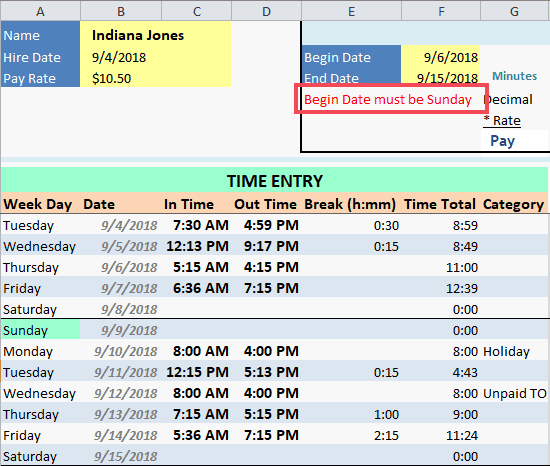
This message occurs when running the ‘Date Range Totals’ report when a Begin Date or End Date is selected that doesn’t coincide with the weekly period.
In the example below, the time card week runs Sunday – Saturday.
The report Begin Date is 9/6/2018 which is a Thursday.
To ensure all Overtime calculations are correct in your totals report; you must select Begin and End dates that coincide with the week begin and end dates.
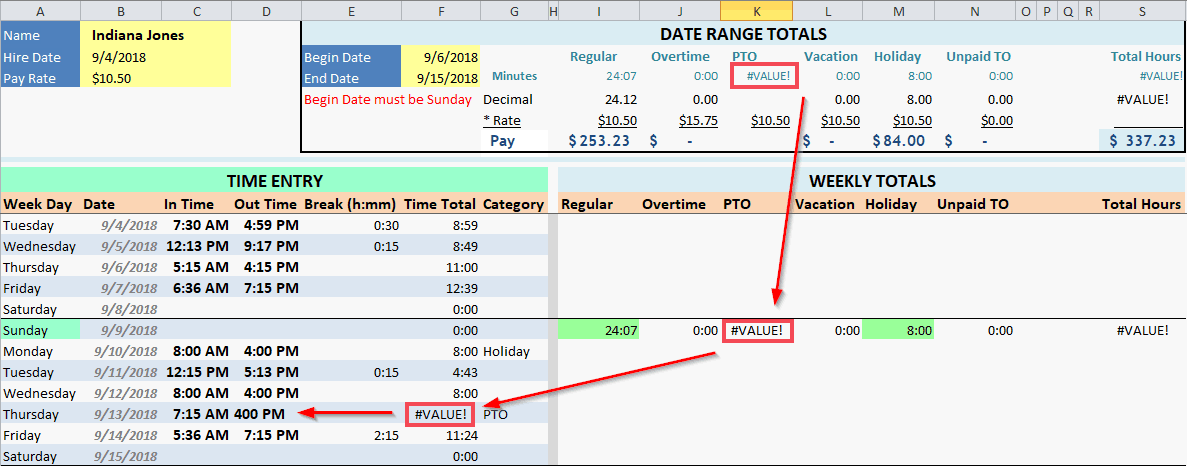
This error may occur in either the Weekly Totals or Date Range Totals section of the time card.
The quickest method to fix is to find the column with #VALUE! error in your totals box, then find the Week with the same error.
Look at the Time Entry lines to determine which date needs fix and update accordingly.
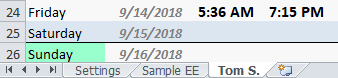
In the example below 400 PM on Thurs. 9/13/2018 is missing the ‘:’ colon.
See FAQ – Time Total is showing #VALUE! for proper formatting.